


| TOPIC: my first |
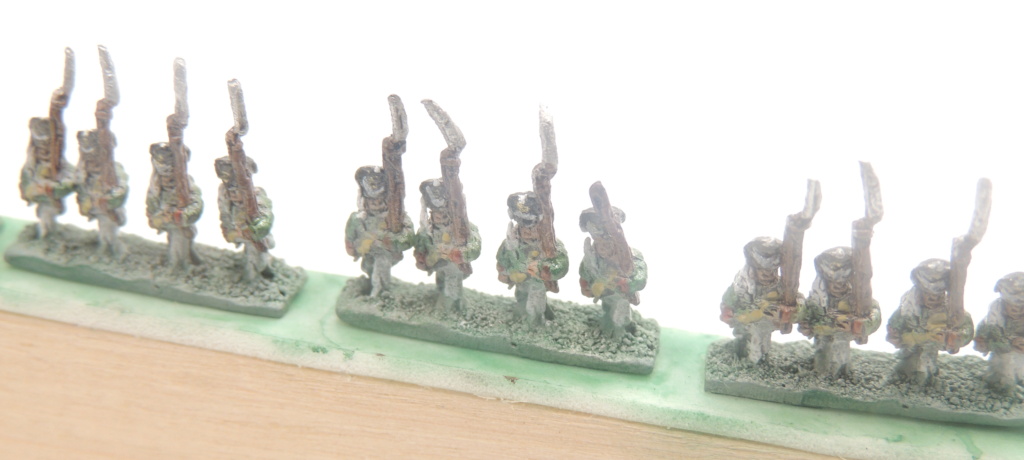
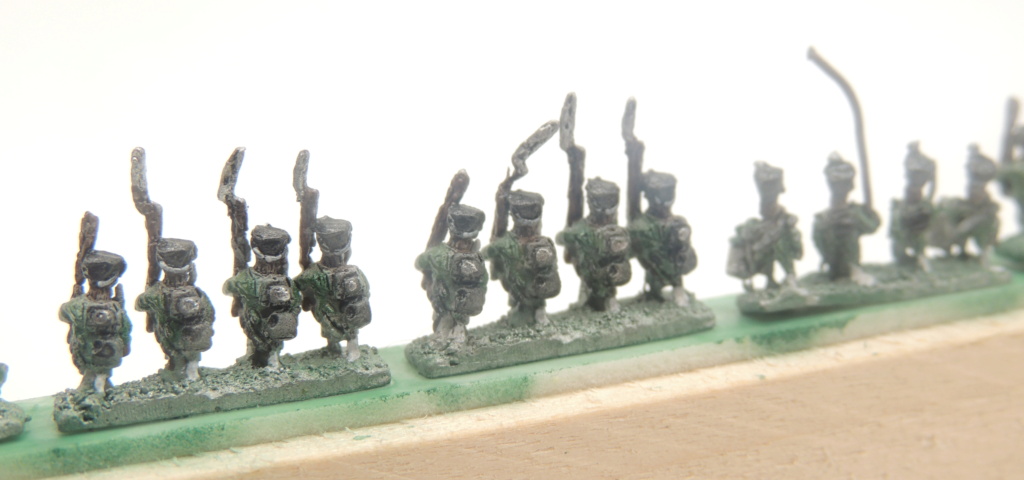
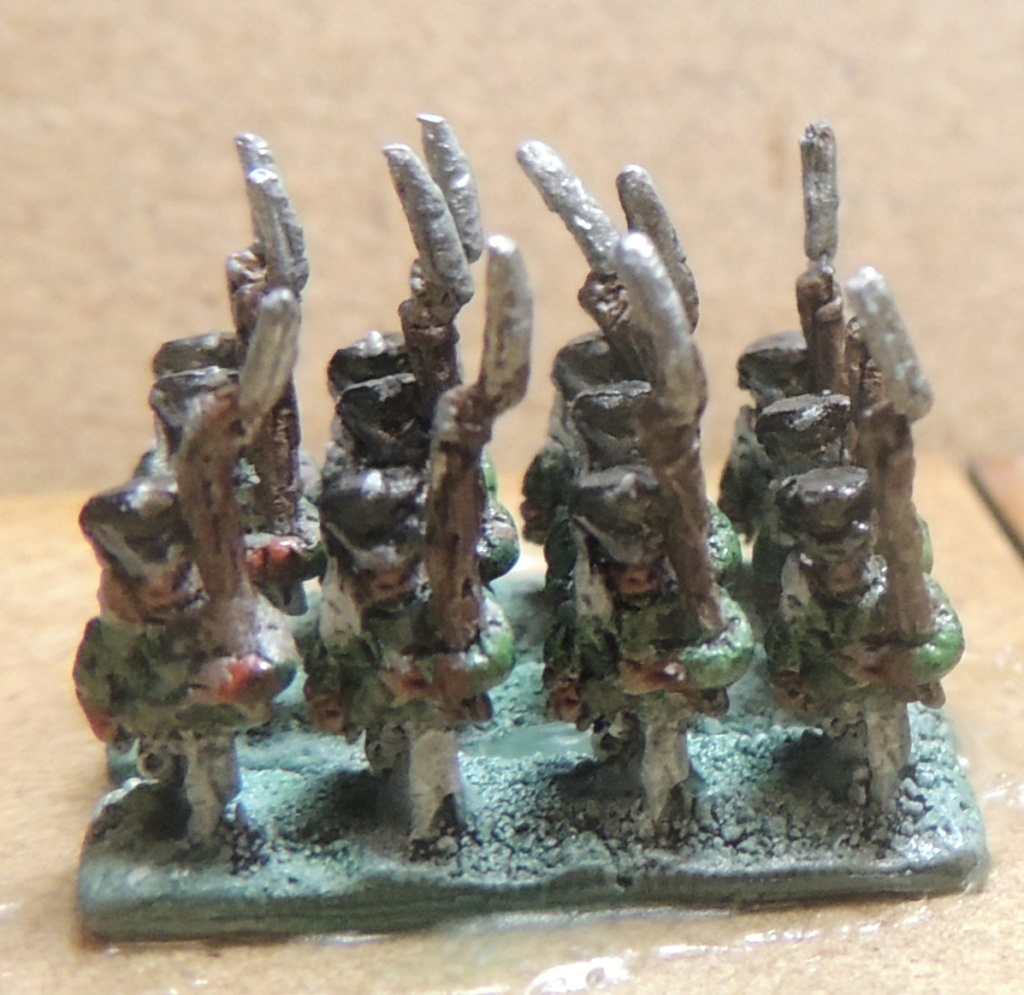
 Standard User Posts: 27  my first my firstonyrevient 26th Oct 2020 10:59:46 ?Hi everybody, After 20 years without figurine for wargame, I'm back. Until now I have never paint 6mm those russsians are my first
The exercise is not as easy as expected, not really satisfy with my green. For now I use tamiya paint but I think order some Howard Hues
|
Standard User Posts: 75  my first my firstBaron Clenawly 26th Oct 2020 05:04:28 When painting 6mm I always follow the principle of 'Go light, Go bright', which includes the bases as well. Otherwise they can look very dark, especially at a distance.
I believe that Russian Uniform colour was a very dark, near bottle Green. I'd look at two shades lighter than this bottle green in order to make them better visually.. Bright Green from the Howard Hues range you mention with perhaps a final wash of Windsor and Newton Nutbrown ink? |
Standard User Posts: 231 my firstmonk2002uk 27th Oct 2020 08:47:46 Alternatively, you could try using an enamel filter over the existing green. Filters are very quick to apply; just brush on evenly but sparingly. There are videos online that show how to use filters. AK4162 or MIG420 are options to consider. The AK version is my preference, FWIIW. Robert |
Standard User Posts: 259 my firstDavid Kay 27th Oct 2020 09:03:19 I had a break in painting figures for nearly 30 years and it is a bit of challenge getting back in the swing especially with poorer eyesight and smaller figures. I tend to use Citadel paints (mostly) but make extensive use of the Coat d'arms and Wargames Foundry ranges for the more specific armour, clothing or horse colours. They are a lot easier to use than the old Humbrol enamels but in some cases do require 2 coats. |
Standard User Posts: 27 my firstonyrevient 27th Oct 2020 10:57:35 Thank gentlemen. The pictures was very exposed. this one is less
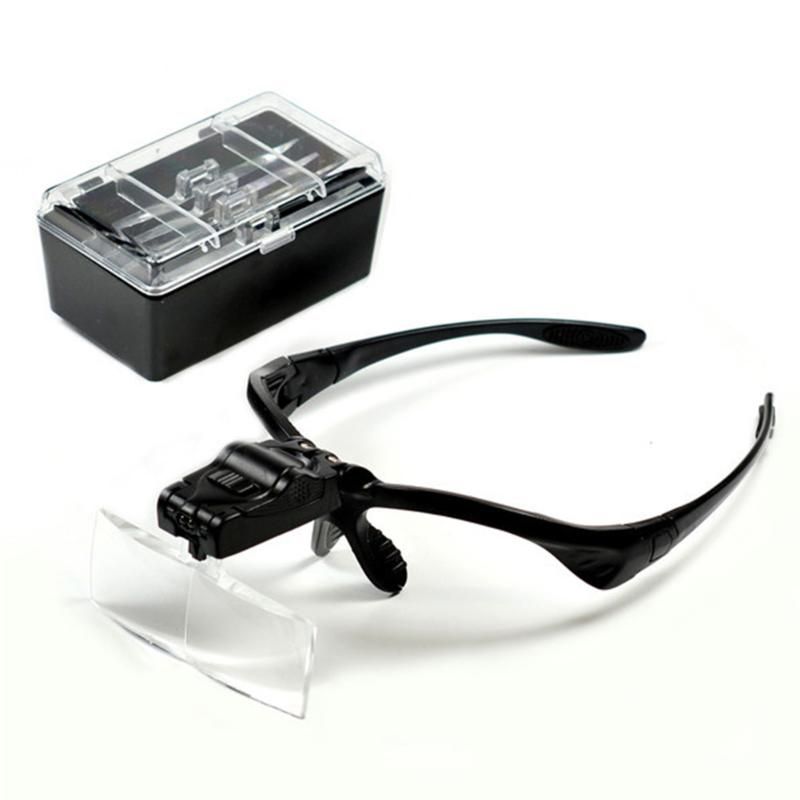
I will try Windsor and Newton Nutbrown ink thank David what you need is magnifer, that change life!
|
Standard User Posts: 231 my firstmonk2002uk 27th Oct 2020 03:08:56 Magnifier and a lovely big LED light. Game-changing! Robert |
Administrator Posts: 997  my first my firstpeter 27th Oct 2020 10:12:17 I would STRONGLY suggest revisiting the technique. I know I will ruffle feathers, but using a white undercoat is really hard work. Try going with very bright shades over a black undercoat in order to achieve contrast and definition. Have a look here to see what I am on about: https://baccus6mm.com/howtoguides/HOWTOPaint6mmfigures/ I have plans. I am dangerous when I have plans... |
Standard User Posts: 259 my firstDavid Kay 28th Oct 2020 08:26:09 Yes having a magnifier is essential! I've been using a x5 one for several years and have two desk lamps on the painting table. Even with this and using 10/0 brushes my results are still best described as "well, most of that dab was very nearly in the right place". But en masse they pass off OK. I would agree with Peter that a black undercoat works and does help to minimise the effects of poor painting or missing that bit. |
Standard User Posts: 27 my firstonyrevient 28th Oct 2020 10:23:04 Ok Peter, I will try with black |
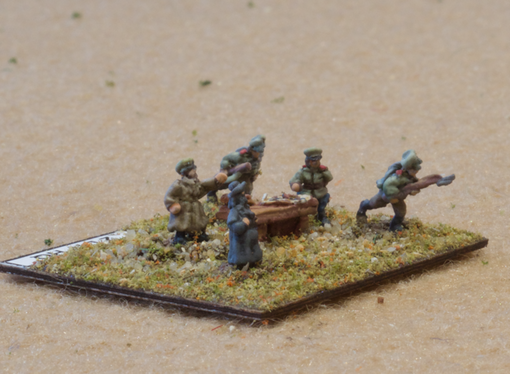
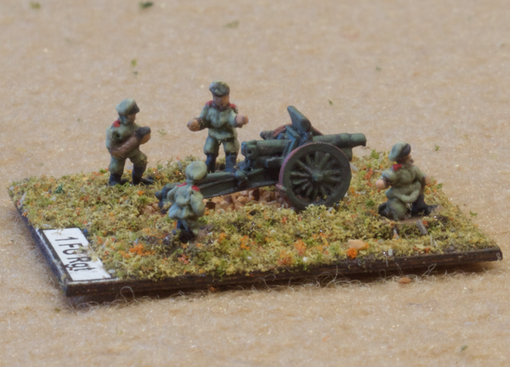
Standard User Posts: 231 my firstmonk2002uk 29th Oct 2020 08:02:42 My preference is a white or light grey undercoat (feathers not ruffled at all, Peter). 'Missing that bit' has been significantly reduced by using the magnifier and bright natural LED lighting. I don't use washes on figures, though they work well with vehicles. The latter can be given a lighter than normal base colour, which is then enhanced rather than overwhelmed by the wash. These days I just paint WW1 figures, occasionally WW2. This does make the work easier. The figures can be sprayed (best option) or hand painted with an overall uniform colour. For the British, this is the slightly greenish khaki of WW1 (different from the British uniform colour of WW2); Germans field-grey; French horizon blue (if late war); Italians grey-green; etc. Some paint manufacturers produce these base colours specifically for WW1 figures now. When sprayed or painted on, they provide a nice base colour that is not too dark with the white or light grey undercoat. I then dab on the highlights in a much lighter colour. Dabbing is much easier than trying to paint up to or near a line/s. It requires a very fine point on the brush, hence the need for the high quality brushes that Peter sells or equivalent. The process is useful for highlighting areas like the forearms, arms (from forearm to shoulder, which I highlight separately from the forearms), thighs, lower legs, helmets, and those parts of the uniform that are visible between webbing, straps, belts, etc. For things like boots, rifle barrels, packs, water bottles, and forage bags, I use brush strokes to apply the base colour then dabs of a brighter colour to highlight. The bright highlights distract from any tendency to paint 'over the lines'. When dabbing on highlights such as hands and faces, let the capillary action do the work of drawing the paint off the tip and onto the surface of the model. This means the lightest of touches with the brush, rather than trying to 'push' the paint onto the surface. When the brush tip touches the model, a small pool of paint will accumulate. It will have neat edges at this scale, with minimal effort. Here are a couple of examples. A white undercoat was used. The figures and gun were then sprayed with Russian green, except for the priest ;-). No wash has been applied to the figures. The field gun had a green wash applied, followed by highlights:
Robert |
Notice: Due to issues with the processing of VAT on deliveries to the EU a limit has been put in place, restricting orders to a maximum of £135. We apologise for any inconvenience this causes.
> Forums
Reply
12
> Painting and Modelling > Gallery > my first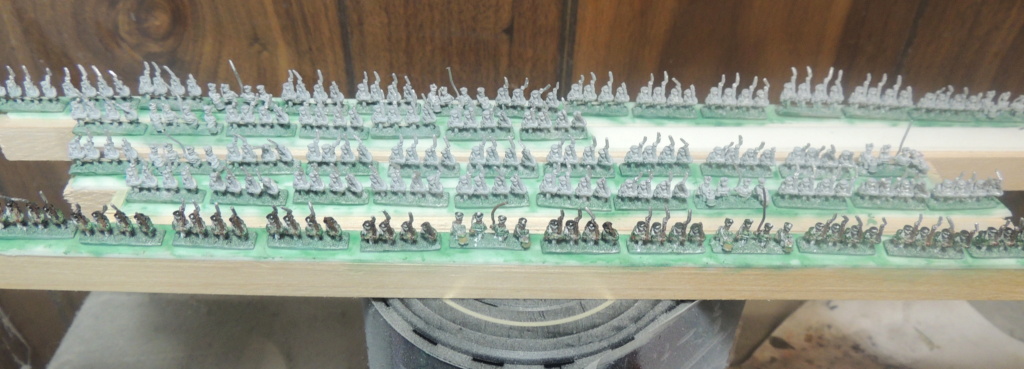

1
NEWS
Coming to Joy of Six 2026...20th Jun 2026
New for JOS26
12th Jun 2026
Joy of Six 2026 Floorplan
6th Jun 2026
Coming really soon....
30th May 2026
We are all packed and ready.
15th May 2026
LATEST FORUM POSTS
Colonials at Khartoum by ChrisBBB22nd Jun 2026
Colonials at Khartoum by Yeppers
22nd Jun 2026
Colonials at Khartoum by ChrisBBB
18th Jun 2026
Baccus Ottoman Army play with Blûcher rule by LEmpereur
17th Jun 2026
Train elements and destroyed unit markers to play DBN by LEmpereur
17th Jun 2026
UPCOMING SHOWS
Joy of Six (Sheffield)28th Jun 2026
Claymore (Telford College, Edinburgh)
1st Aug 2026
Colours (Newbury Racecourse)
5th Sep 2026
LATEST RELEASES
Italian Combat Engineers
Italian MMG and crew
 WWI05
WWI05Italian 4.5cm mortar and crew
 WWI06
WWI06Italian ATR and crew
 WWI04
WWI04Italian LMGs and crew