


'I CAN'T POSSIBLY PAINT ANYTHING SO SMALL.....'
As a trader specialising in 6mm scale figures I spend a lot of time at conventions talking to wargamers on the subject of painting figures. Many are experienced collectors in this scale wanting to know if I have any tips that I can pass on. However, very large numbers are individuals who peer at my wares, screw their eyes up and frighten themselves to death at the prospect of getting the right types of facing loops on castings which are so small. There then follows a series of ritual responses that goes something like this:WARGAMER: Hail, honest trader! How do you do those? I couldn't possibly paint anything so small!
HONEST TRADER IN FINE SMALL SCALE WARGAMES FIGURES: It's a lot easier than you think. Believe it or not, they are easier to paint than larger scale figures.
WARGAMER: Scallywag! Capon! Poltroon! You will tell me anything! I have enough trouble painting 25mm figures never mind these. It takes me two months to paint twelve infantry for one battalion.
HTIFSSWF: Seriously, these are easier to paint than bigger models and you can do it quickly too. This regiment of three hundred English Civil War figures only took me three nights to do.
WARGAMER: Hah, Tricky Cockscomb and Vile Rogue! Got you! You are telling porkies big time in an attempt to inveigle me into buying some of your fine wargames figures. No one could paint that many figures that quickly. I shall leave you and not look behind me! Rotare me Satanus! A pox on you and yours, yea even to the fifth generation! Returnest thou to selling double glazing to gullible fools! I was not born yesterday etc. etc. (Exits stage right.)
HTIFSSWF: Did I say something wrong?
What we have here is a classic case of misunderstanding. Comments about perceived inability to paint small scale figures or speed of painting always come from people transferring their experience of painting 25mm or 15mm figures directly to the smaller scale.
What they fail to realise is that painting 6mm castings requires a rethink of techniques and methods of applying paint. As opposed to producing pieces of military sculpture on wargames bases, we are attempting to create an overall effect of a large body of men and are therefore aiming to emphasise only those features that can be picked out from a viewpoint of over a metre away from the figures. It may be personally satisfying to paint tiny belt buckles and musket locks but it isn't going to get your army painted quickly and who the hell is going to see it anyway?
The other classic mistake is the constant reference to 6mm figures. Most manufacturers supply their castings ready-based on strips, and it is these that represent the unit of production. For example, if you paint a small unit of Napoleonic Line Infantry, you are producing eight strips (each holding four figures), not thirty two individual figures.
I am not an expert painter and regard myself as being totally unskilled. However, more than any other scale 6mm lends itself to applying painting techniques rather than the exercise of skill in order to get acceptable results. My personal aim is to spend as little time as possible with a paintbrush in my hand, as life is too short to be chained to a table crammed with paints and pots of water.
THE TOOLS OF THE TRADE
Paints
These are the subject of some controversy. In the old days wargamers always used enamel paints, while the more arty military modellers used oils. Some sad individuals in both camps still do. We are lucky enough today to be surrounded by a multitude of organisations and individuals who will be only too happy to supply us with a kaleidoscopic array of water-based acrylic paints at the drop of a few shekels.
Let me lay out the options for you:
Oil paints require you to muck about with turps or white spirit. They are messy and impossible to clean when spilt, are very smelly and take an interminable time to dry, thus slowing the painting process dramatically. On the other hand they do allow subtle and fine blending of tones and shades, and are the preferred medium of fine artists.
Enamels take only slightly less time to dry than oils, but are just as messy and you can never lever the top off those damn tinlets after you've used them once. However, they are good for painting models of classic steam locomotives.
Acrylics are water based, easy to use and will mix with a wide range of other water based paints and inks. They are easy on your brushes, quick to dry, make the painting of large numbers of figures simple and are the preferred choice of all right thinking people who value freedom of expression and independence of thought, and would like to finish painting a wargames army occasionally.
Your choice!
I have a collection of paints from a range of sources, but am gradually going over to using artist's tube acrylics as they offer a vast range including metallics, and work out cheaper than buying paint in little glass or plastic bottles.
Brushes
These are vital tools. My personal collection ranges from a size 1 to a 15mm household paint brush. Always buy the best quality that you can afford. It is no use attempting to paint fine detail with a brush nicked from a five year old’s paint box. There is also little real value to be gained in buying anything small than a size 0. If you invest in a good quality brush the fine tip cannot be bettered by anything smaller and the ability to carry a decent consistent paint payload is greatly enhanced. Do not take any notice of the sad man who tells you that he has the world’s largest collection of micro-sized mono-bristle brushes. You can get better effects than he can, and you won’t have to wear an anorak.
Painting Bases
The secret weapon in the struggle to paint castings quickly. These are strips of plywood, hardboard or MDF measuring about 200mm by 20mm. First tack (lightly glue) your strips to the base lined up side by side facing the same direction in one long line. The base now provides you with something to hang on to while painting the castings without having to fiddle about holding individual strips.
HOW TO DO IT
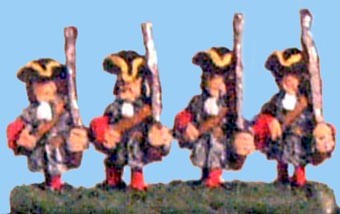
I will use as an example a French battalion from the Marlburian period. This will consist of 192 figures based on groups of four, giving me 48 strips. To start I will have tacked these on to six painting bases each holding eight strips, plus one holding the various command elements.
Painting should be done in a series of layers, starting with the dominant colours and working outwards. Each successive layer should require you to apply paint with more care and attention, as the final few layers will decide the 'look' of the finished article. You should aim to apply each colour once only.
1. Undercoat
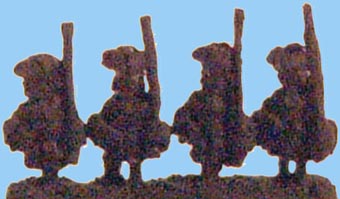
This layer provides a key for your top layers of paint. While some people
swear by white as a base colour, I use black, and the rest of this guide
is based upon this premise. I tend to paint a lot of strips at once so
I use spray car paint which covers well and dries quickly. If you do the
same, please remember to wear a mask unless you want an interesting extra
stratum lining your lung walls. Once the undercoat is dry we are ready
to move to the job proper.
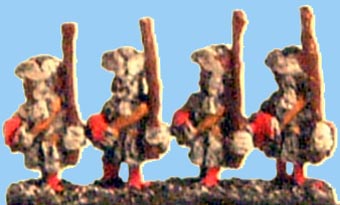
2. Light Grey
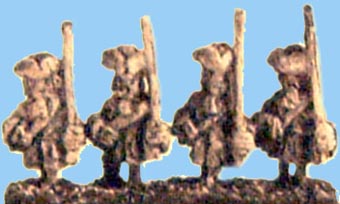
The French Infantry in this period wore a light grey coat, and this colour
is applied first as it is the dominant uniform colour. It always pays
to use a lighter/brighter shade than the original on small scale figures.
This is for two reasons. Firstly the black undercoat will have a dulling
effect, and secondly you have far less surface area on a 6mm figure so
you need to be a bit bolder to get the colours to stand out.
This coat should be applied as a drybrush. To those of you who don 't
know about or have not yet mastered this technique, it is well worth having
in your armoury. You need to have a stiff paint mixture (another advantage
to using tube acrylics), and to load this on to a fairly broad brush.
Dry your brush off on a piece of kitchen paper, and then run the bristles
along the surface of the strips, leaving a deposit on the raised areas,
allowing the black undercoat to show through to provide relief and detailing.
If your figures are properly detailed, this single coat will effectively
define your progress for the rest of the job.
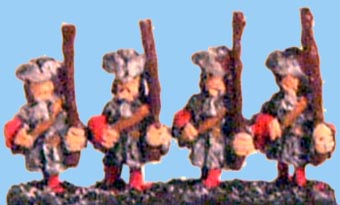
3. Brown
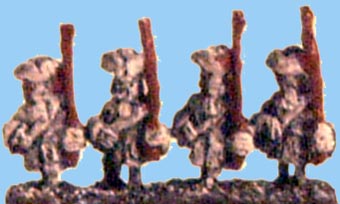
Using a fine brush paint in the hair, (everybody in my armies has brown
hair!), and the musket.
4. Facing Colour
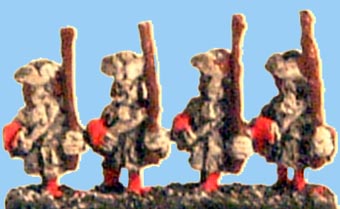
In this case, a bright red applied to the cuffs and the socks. To paint
the latter, just run the brush laterally along the legs from left to right
and front to back. Don't worry about overspill from the cuffs on to the
hands as this will be tidied up by the next layer.
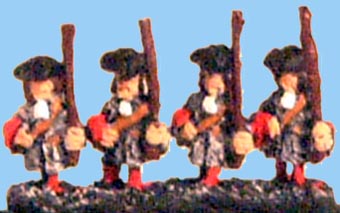
5. Buff
You need to take a bit of care with this one as you have a straight line
to paint. In this case, we must add a cartridge box and baldric and sword
scabbard. There is a waist belt defined, but I never bother to do this,
as I am not a purist.
6. Flesh
Self-explanatory. Note that where the black undercoat is left to show
through it helps define edges and shading.
7. Black

Hats.
8. White
The white neck cloths tidy up the figures and make them look much more
military.
9. Yellow
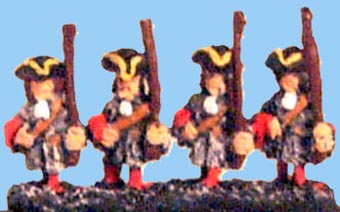
The hat lace. It is worth taking some time over these details, as they
are the things that catch the eye from a distance. I have to admit that
this is the slowest and most tedious part of the process.
10. Silver
Musket barrels. Silver rather than gun metal, because it is flashier and
looks better.
Some of you are more familiar with large scale figures may think that
these images look a little rough. Remember that they are shown at twice
actual size. The finished version is actually this size ....
There you are, a job well done. Of course you can add more detail such
as shoulder straps, piping, facial hair, buttons and so on, but is there
any point? These things are important in a large scale figure which is
why painting the damn things is so time consuming. Down among the midgets
such attention to detail only brings you up against a savage and unforgiving
Law of Diminishing Return.
While all the main action is going on you can be spending a bit more time
on the sundry officers, ensigns and drummers that will litter the place.
It is perhaps worth taking a bit more care with these chaps as they are
the individual figures that your peers will be drawn to look at, and complement
you on your painting skills.
You can add a final layer of varnish; matt, eggshell or gloss. May I recommend
a trip to a DIY store and an investment in a BIG tin of household polyurethane
varnish. It works out cheaper than buying dinky pots of the stuff from
modelling suppliers and armour-plates your little pride and joys.
One important aspect which if often overlooked, is how to BASE your painted
figures.
Horses
This is my least favourite subject as I cannot paint horses. Here is how
I go about it. (Real painters can avoid this section.) Firstly most horses
are brown - well, most of mine are. Apply dark brown to almost every horse
that you are painting. Mix a darker brown shade, almost black, and apply
to all lower legs, manes and tails. Leave to dry.
Paint any whites or greys by applying the appropriate colours. Duns should
be a biscuit/buff colour. The former can have grey manes, tails and lower
legs, the latter black.
Once the first layers are dry, use white to apply socks at random and
add stripes or stars to the front of the head. This will have the effect
of breaking up the solid mass of brown and applies some individuality
to the beasts. It is simple and it works.
Painting the riders is done using the layer technique. If you are painting
dark horses you can get away without painting the tack unless you are
really inclined to do so.
Flags
It is important to get these looking good, as they are the things that
will really catch the eye. Be big, be bold, be brassy and bring out the
main features that can be seen from a distance. It doesn't matter if you
cannot get the right number of talons on your rampant frog, or if you
dispossess the Union of some states on the star-spangled banner - it is
the overall effect that counts.
Of course you can always cheat and use some of the pre-drawn, pre-coloured
flags produced especially for 6mm figures by Baccus 6mm.
If you have followed these instructions to the letter for the first time
you will have combined your skill as a painter with the designer's as
a sculptor to produce a masterpiece - alternatively you will have something
that looks like a messy if microscopic traffic accident. If the latter,
the motto is to keep on trying, as we all know what practice makes don't
we children?
As usual having written this piece I find it hard to believe that anyone
cannot have been swayed by my powerful arguments and impeccable logic.
It only goes to show the powers of self-delusion. For the record, the
192 figures for the battalion in this example were painted in a couple
of two hour sessions. By the time you add a few extras in for officers,
adding flags and basing (excluding drying time), the whole project took
a few minutes over five hours. That works out at a rate of less than two
minutes per figure.
There really is only one way to find out if I am really telling the truth
about the ease of painting of 6mm figures, (and note there was not one
single mention of a magnifying glass in this guide). Have a go yourself.
If you are still saying, 'but I can't possibly paint anything so small...',
how do you know if you have never tried?
Painting scenery
Once you have got your little warriors on to the tabletop you have to
make a Little World for them to squabble over. You order the miniature
real estate and natural history from the nice man in Sheffield, and then
scratch your head. 'I can't possibly paint anything so small...'
Here we go again!
I'll start by repeating the gist of what I have said about painting little
men. Remember that you are painting for effect. Imagine what the eye will
be able to pick out at three feet and concentrate on that. There is no
need to worry about painting every individual plank, hinge, wheel spoke
and brick. The techniques that I concentrate on involve a judicious use
of well-chosen colours and lots of highlighting and drybrushing.
Preparation
Okay, not every casting that I produce is absolutely perfect. (I admit
it, most don't.) You may find the odd air bubble, mould flaw or bit of
flash. You may therefore need to do some work cleaning up the casting
prior to painting. How much work you do is up to you. Filing off rough
edges and making sure that multi part castings fit together is recommended.
Filling in every last air bubble is not. Remember the three-foot viewing
rule.
Once you are happy with the castings assemble the models and undercoat
them. As with figures I start from a black undercoat. Also as with figures
I tack smaller models on to a long stick to provide a handle during the
painting process.
Buildings.
Apply a general light grey drybrush. This can either act as a topcoat
if you want the walls to be that colour, or as a key for successive layers.
If you want a brick or tile effect, use a terracotta red at this stage.Leave
to dry.
Apply a topcoat of the chosen colour, but try and leave a thin line of
the black undercoat showing thorough around the doors and windows. For
half-timbered buildings line in the frames with black brown. If you want
to be flash with bricks and tiles, wash some ink was over the model. This
runs into the all the courses and gives a lovely effect. If you want to
be even flashier, pick out the odd brick, or course or group of bricks
in the original colour to give a slight unevenness to the finished product.
It does look good.
Paint window panes with a dull silver or gunmetal. Some of the Baccus
models have half-leaded panes and these can be emphasised by a thin wash
of black ink. You should note that if you are painting churches stained
glass is designed to be seen in its full glory from the inside of the
building and it looks pretty dull from the outside.
Finish off by painting all doors, door frames and window frames.
The roof should be treated in a similar fashion, with the use of inks
and washes to bring out tiles and slates. Remember that thatched roofs
are generally done with reed which is grey not bright yellow. Even straw
thatching loses its colour very quickly.
Gabions, fences, gates and assorted woodwork.
These are all very simple, but you must bear one point in mind. Once wood
has been exposed to the elements it turns a greyish colour not light brown.
Honest.
Getting a realistic wood effect is a snip. Drybrush light grey and watch
the detail emerge from the black undercoat. On gabionage run the brush
against the grain of the weaving and the gabion will appear as if by magic.
The trick with all of this is to apply paint at a shade or two brighter
than you would expect to use on 15mm or 25mm scale models. You have far
less surface area with which to make you colour statement, so you need
to be bright and bold. It is the CONTRAST that defines how the model appears.
These techniques are very personal, and I may take the skills and experience
of the reader for granted. All I can say is that they work for me, and
are VERY quick. If you find it hard going at first, persevere and you
will soon find it comes good. If you can't get on with any of this, and
I know a lot of people are very uncomfortable with black undercoat then
please share your techniques and experience with others on the site Bulletin
Board.
Happy Painting,
Peter
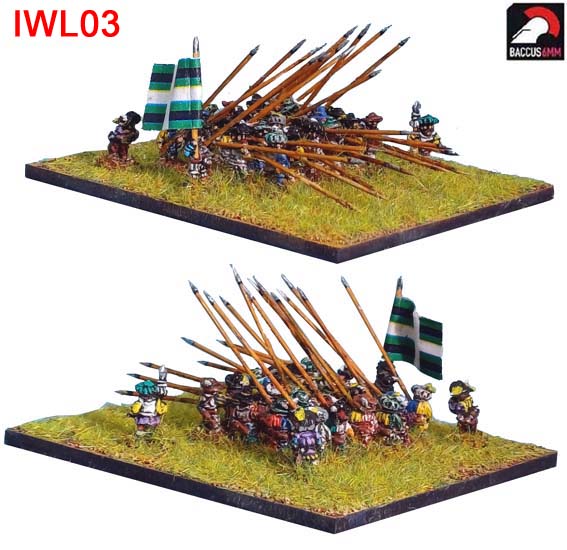 IWL03
IWL03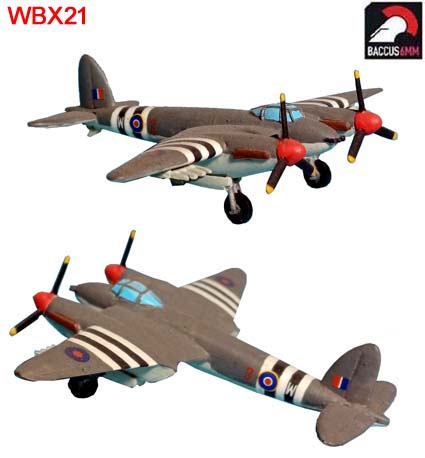 WBX21
WBX21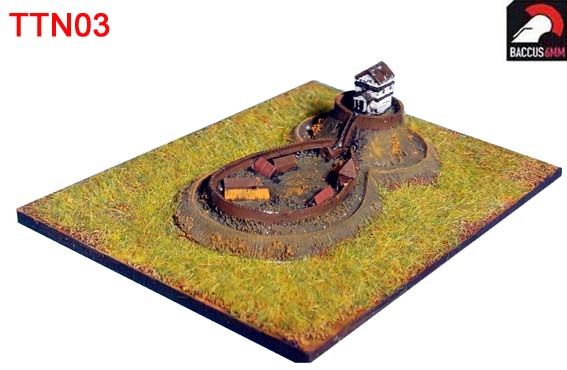 TTN03
TTN03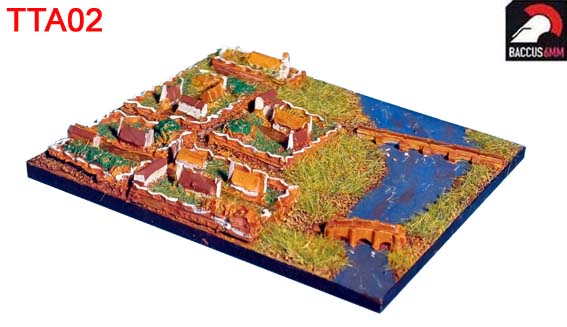 TTA02
TTA02 TTw0
TTw0